Give Your Dining Set a Festive Makeover with Shabby Chic Chalk Paint
As the festive season approaches, it’s the perfect time to give your home those finishing touches that make it feel warm, welcoming, and wonderfully festive. With guests coming over for Christmas celebrations, why not impress them with a DIY project that will breathe new life into your dining space? Today, we’re exploring a simple, yet stunning transformation of your wooden dining set using Rainbow Chalk’s Shabby Chic Chalk Paint.
Why Focus on the Dining Table?
The dining table is the heart of Christmas day! It’s where we gather to enjoy a festive feast, share stories, and create memories. But if your dining set looks a bit worn or doesn’t quite fit the festive vibe you’re aiming for, it can dampen the spirit of your celebrations. That’s where our chalk paint comes in, offering a quick, easy, and affordable solution to revamp your furniture.
The Magic of Chalk Paint
Chalk paint is an excellent choice for upcycling furniture, especially for those who are new to DIY projects. Our formula is creamy and opaque, ensuring fantastic, lasting results. It adheres beautifully to wooden surfaces, giving a smooth, matte finish that’s perfect for achieving that sought-after shabby chic look.
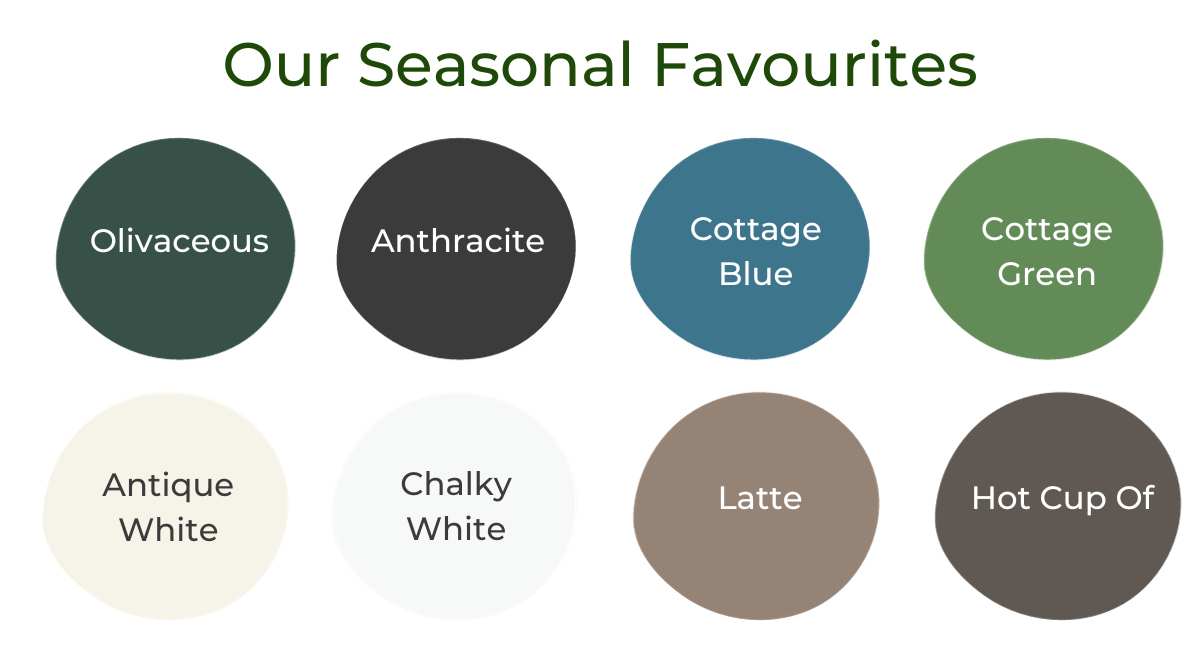
Over 30 Colours to Choose From
No matter your festive theme or color scheme, our range of over 30 colors ensures you’ll find the perfect hue. Whether you’re looking for a classic winter white, a warm festive red, or a more unconventional Christmas blue, we’ve got you covered.
Step-by-Step Tutorial for Upcycling Wooden Furniture
What You’ll Need:
- Rainbow Chalk’s Shabby Chic Chalk Paint
- Sandpaper (optional)
- A set of brushes or a roller
- Soft cloth
- Clear furniture wax (optional)
Step 1: Prep Your Furniture
Start by cleaning your dining set. If your furniture has a glossy finish or some imperfections, lightly sanding it can help the paint adhere better. Wipe down the surfaces to remove dust after sanding.
Step 2: Choose Your Colour
Select a color from our range that complements your Christmas decor. Remember, you can also mix colors to create a custom shade! Just be sure to mix enough for the job, because mixing the same exact custom shade again can be tricky!
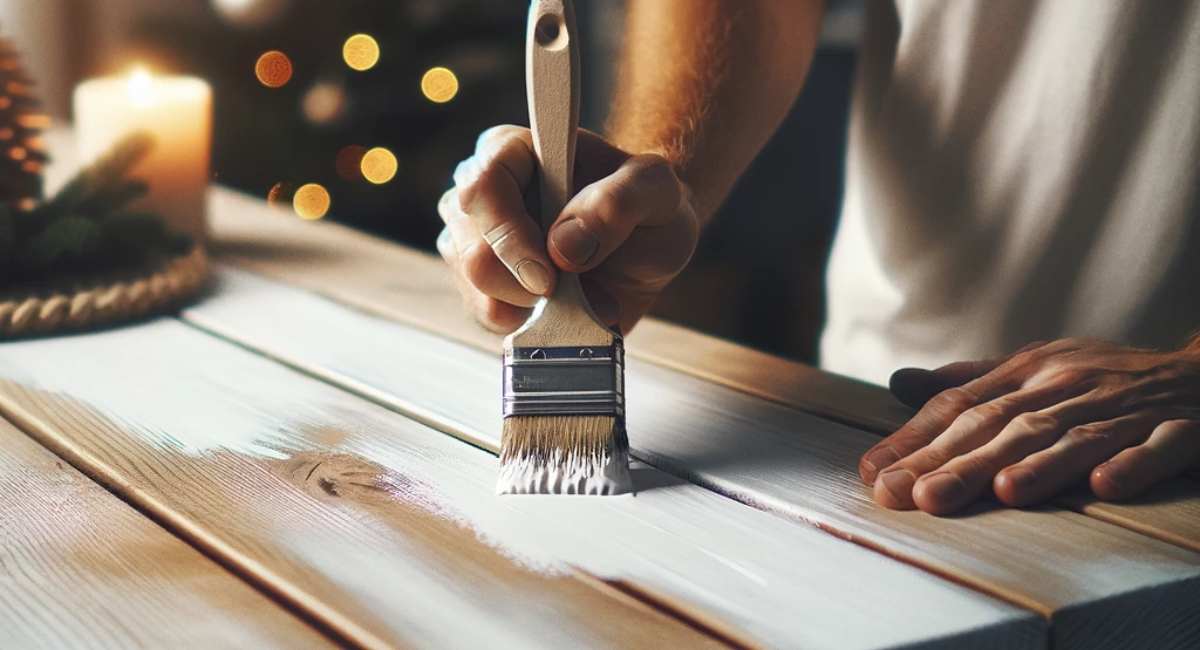
Step 3: Start Painting
Stir the paint well before use. Then, using a brush or roller, start applying the paint to your furniture. Our chalk furniture paint is known for its great coverage, so you might only need one coat, but for richer color, you can apply two. Let the paint dry completely between coats.

Step 4: Distressing (Optional)
For a more vintage or shabby chic look, gently sand the edges and areas where natural wear would occur. This step is optional but adds character to your furniture.
Step 5: Finishing Touches
Once the paint is dry, you can leave it as is for a matte finish, or apply clear furniture wax for added protection and a subtle sheen.
Why Choose Rainbow Chalk’s Shabby Chic Chalk Paint?
Our paint isn’t just aesthetic appealling; we’ve perfected the formula to be as high quality and easy to use as possible. It’s water-based, eco-friendly, and virtually odorless, making your DIY project a pleasant experience. Plus, our quick-drying formula means you won’t have to put your life on hold while you wait for the paint to dry.
Start Your Dining Table Transformation Today!
Upcycling your dining set with our Shabby Chic Chalk Paint is a fantastic way to add a personal touch to your festive decor. It’s a simple, satisfying project that will not only impress your guests but also leave you feeling proud of your handiwork.
Ready to start your dining set transformation? View our full shade range below.
Happy painting and happy holidays!
Shabby Chic Chalk Based Paint
Look no further for a velvety, opaque, chalk-based furniture paint. With a richly pigmented formula and no need for primer, upcycling just got a whole lot easier.