We’re Green With Envy! Customer Worktop & Kitchen Cabinet Renovation
Do you ever look at someone’s kitchen renovation and become green with envy over the fact that it’s not yours? That certainly was the case when we came across this customer renovation… and it’s not just because the cabinets are now a rich shade of green!
We love putting our customers in the limelight – let’s take a closer look at this incredible worktop & kitchen cabinet renovation performed by Kayleigh.
The Kitchen Cabinet Renovation Project
Kayleigh is an upcycling enthusiast. She loves experimenting with new styles and transforming pieces of furniture into breathtaking works of art. Her kitchen was no exception!
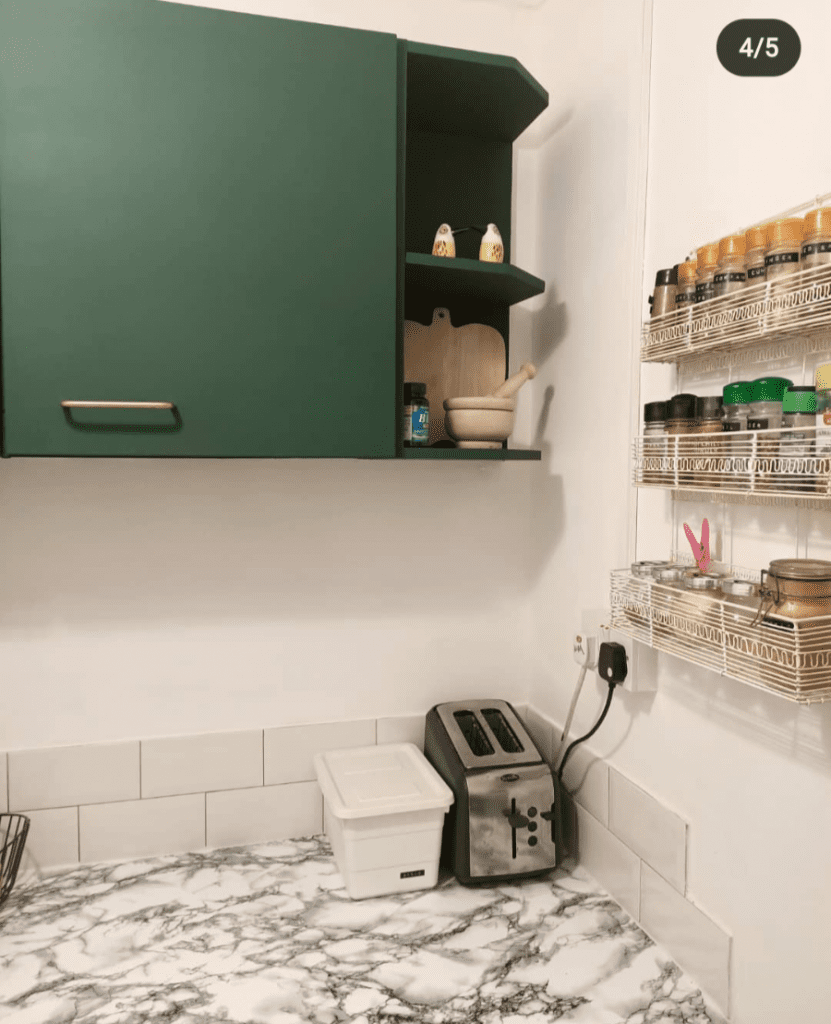
During lockdown, Kayleigh decided that it was time to add some personality to her small kitchen area. The worktops were too dark for her liking and the cabinets blended in with the rest of the cream interior. It was time to go bold and add some edge to the room.
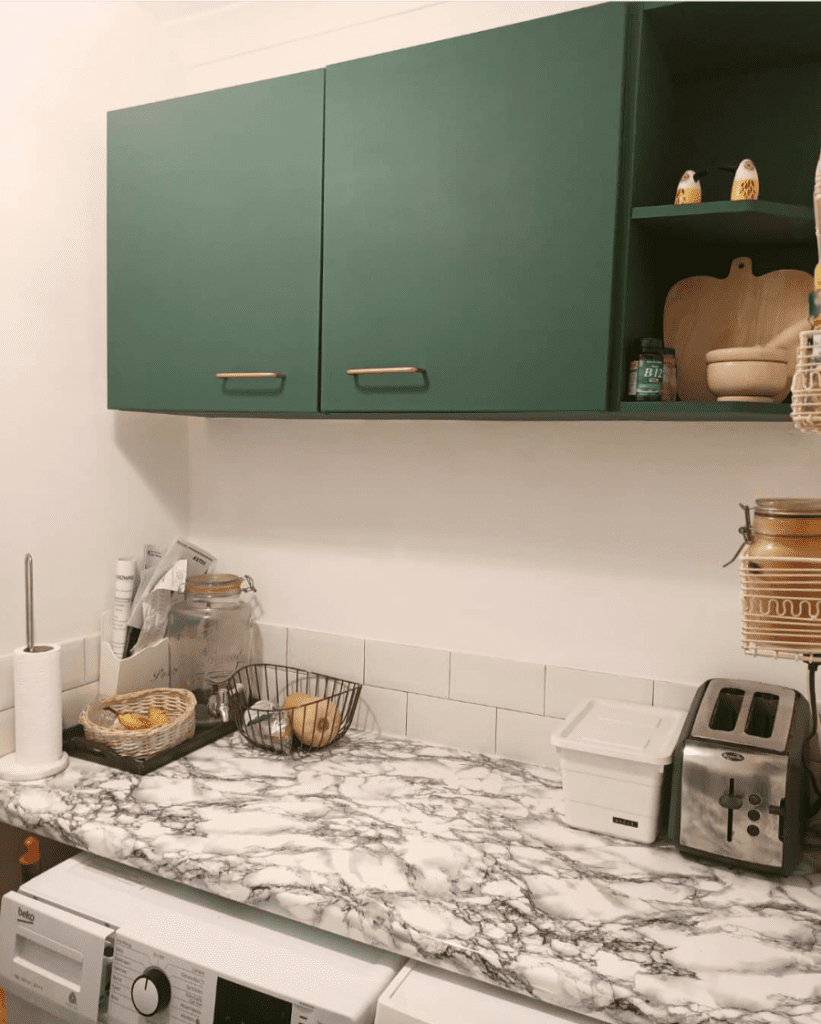
With help from The One Paint Matte 1 Litre in shade green, and marble vinyl stickers, Kayleigh completely transformed her kitchen into a bright modern space. The best part? The whole project was super easy and affordable.
Products Used
- Rainbow Chalk The One Paint Matte 1 Litre
- Gold handles
- Marble vinyl adhesive film
How To Paint Your Kitchen Cabinets
Thanks to our best-selling The One Paint, it’s never been easier to get your kitchen cabinets looking as incredible as Kayleigh’s. This 2in1 paint and primer effortlessly glides over most surfaces, resulting in a luxurious finish.
So – how should you apply The One Paint to get results like Kayleigh’s? Follow the steps below…
Step One: Clean Your Surface
Although a primer isn’t needed with The One Paint, your surface still needs to be as smooth as possible. Remove any dirt with a damp cloth and dry the surface thoroughly after doing so. If you are after a smooth finish, sand down the surface if necessary.
Step Two: Apply The Paint
Stir your pot of paint, ensuring that the colour has mixed properly. From here, use a brush to apply an even coat over your surface. You can use a roller instead of a brush if covering a large surface. The choice is yours.
Step Three: Let It Dry
Allow the paint to dry for two hours before deciding if a second coat is needed. This will give the colour enough time to develop and also prevent the paint from becoming ‘tacky’ when applying more. If you decide to add a second coat, repeat step two.
Step Four: Clean Your Brushes
Cleaning up has never been easier, thanks to The One Paint. All that’s needed is some warm water. Let your brushes soak in this warm water and scrub them gently to clean any mess.
Voila! No time-consuming cleanup mission and certainly no stains in sight!
Feeling Inspired? Time To Transform Your Kitchen!
It really is that easy to transform a room with help from a lick of paint. And, now that you know how achievable results like Kayleigh’s are, why not try yourself? Our The One Paint range features an array of colours and finishes, fitting absolutely any vision you might have in mind.
Don’t forget to show us your amazing work by uploading it to socials or emailing us at info@rainbowchalk.com!