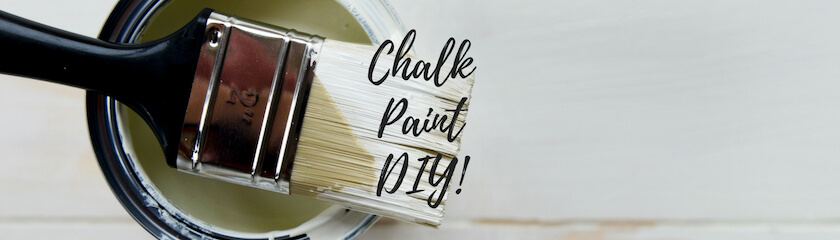
DIY Coffee Table Renovation with Chalky Furniture Paint
Today’s blog post is written by a customer who transformed her living room with a DIY coffee table renovation using our shabby chic furniture paint . The results are fantastic, so keep reading for her simple step-by-step process!
Getting Started With Your Coffee Table Renovation
Before we get stuck in, let’s cover the boring but important stuff first – to sand or not to sand?
This particular coffee table had been previously painted with another brand of chalk paint. Whether you’re painting over a previously painted or varnished surface, I highly recommend sanding the surface so that the paint can adhere proberly and you’re left with a smooth finish.
I’ve made the mistake of trying to paint over heavily varnished / painted surfaces before – so let me save you the bother!
But beware of chalk paint bleed through – Dark woods like mahogany are notorious for bleeding through and ruining the paint finish. In this case, I would avoid sanding or do so very gently and with caution.
Now that’s out of the way, let’s dive into what you will need for your coffee table renovation project:
What you will need:
Here’s what I used:
- Rainbow Chalk’s Liquorice Chalk Paint
- a selection of paint brushes
- sandpaper
- dust sheets
- and a paint mixing stick
First, We Prep!
To start, lay down your dust sheets, newspaper or bin sacks in the area you’ll be working. I live in a rented property with cream carpets, so you can imagine I was a tad on edge at the thought of using black paint in my living room… It doesn’t matter how neat you think you’ll be – it’s always worth protecting the floor from accidental spills!
To achieve a rustic, exposed wood effect like mine, lay the table upside down with the surface against the floor and leave the top unpainted. I didn’t use masking tape to get a super clean finish because I figured that the underside wouldn’t be seen. But, if you’re a perfectionist, now’s the time to tape the table up.
At this point, if your table needs sanding, give it a light rub over and ensure to go with the grain of the wood. Circular motions will disrupt the natural wood grain and could cause splintering.
Wipe away the dust with a damp cloth and ensure the paint is thoroughly stirred, and then you’re ready to start painting!
The great thing about Rainbow’s shabby chic furniture paint is the thick opaque formula which meant I didn’t need to use a primer. It cut the project time down massively, which is great for impatient people like me. I could enjoy the finished product sooner!
Painting Your Coffee Table
Now for the fun part…
I used a small amount of paint on the brush and applied the first thin coat using a sweeping back and forth motion. It’s always better to do a few thin coats instead of slapping a thick layer on that won’t dry evenly and may cause the paint to bubble.
This paint glided onto my table like a dream! A little bit goes a long way. See the video below:
It was recommended to leave the first coat to dry for an hour. So I took the time to pop to my local DIY shop and grab a gold spray paint for the handles (more on that later.)
Roughly an hour later, I applied another thin coat and left it for a few hours to thoroughly dry. The end result was a soft chalky matt finish, which I loved!
To protect your new paint job, you may want to think about applying a small amount of protective furniture wax to safeguard against small bumps, scratches and stains. This will make your life a lot easier when it comes to cleaning your newly upcycled piece!
The Finishing Touches
The hardware on this table was silver but I wanted gold to match the other warm / gold accents in the room. I used a small can of spray paint to achieve an antique gold colour.
I did this by using an old cardboard box from a delivery I had that week, puncturing four holes in it and placing the handles into the cardboard box so I had easy access to all at angles. I found that one coat of this spray paint did job so I didn’t bother taking it out for a second coat (also it may have been because at this point I was so excited and impatient…)
Once I was sure that everything was dry, including my handles, I re-attached them and assembled the drawers into the table and stood it up right.
I stood back and admired the fruits of my labour. I was absolutely thrilled with the outcome and couldn’t have been happier!
Conclusion – How Did I Find The Rainbow Furniture Paint?
I had put off this coffee table renovation project for a really long time because I had assumed that it would take a long time.
I desperately wanted my coffee table to match my new sofa and it irritated me every time I looked at it…
After I had finished the up-cycling, I felt so silly because this was such a quick and easy project! The Rainbow chalk furniture paint dried so quickly and evenly that I had whole thing finished up within one afternoon. I would love to say that I put in a load of elbow grease to get the table looking this good… but it’s just not true!
I immediately started looking around my living room for other pieces that I could easily paint. It’s addictive!
Let’s talk value for money. I ordered a 1 L tin and, after doing two coats of the liquorice black paint, I still have more than three quarters of the tin left.
I used such a little amount of paint and got great coverage. This means I have enough for another couple of projects, at least!
I’d highly recommend this paint for anyone looking to do cheap, quick and easy DIY projects at home.
Order Your Tin Today
And there you have it – transforming your living space with chalk paint is so quick and easy.
If you fancy giving it a go, use this link to view our entire range of 30+ matte and metalic shades.
First time buyers get 10% off with code: ftb10
Send your DIY pictures to info@rainbowchalk.com or DM us on Instagram to have your projects feature on the blog!