No Need For A Grout Removal Tool – Great Grout Is Easy With A Grout Pen
If your grout is looking grotty, your kitchen or bathroom won’t look its best. Every day living takes a toll on grout, blackening and discolouring it, leaving your tiling looking drab and unsightly.
So what are your options?
Using A Grout Removal Tool Is Hard Work
You could replace the grout, but doing so can be a hassle. You have to pick the right grout removal tool, then spend hours sawing the old grout out from between the tiles and disposing of all those old grout flakes.
When you’re done, you’ll need to mix your new grout, then painstakingly apply it in such a way that it doesn’t sag or drip. Add in the hours of drying time, and it’s easy to see that replacing grout is a messy, time consuming business.
This is where a grout pen can make all the difference.
Better Looking Grout Made Easy
Instead of replacing your grout, why not revive and recolour it for a clean, new look with less fuss? With a grout pen, you can refresh your existing grout with no need to saw and strip old grout, or spend time mixing and applying the new.
A grout pen is as easy as using a correction pen for your writing – you simply draw over the bits you don’t want to see, replacing them with a bright white finish. It’s simple to do. All you need is a little patience and a steady hand. You can have beautifully finished grout, simply by drawing the pen over the grout lines.
Getting The Best Results From Your Grout Pen

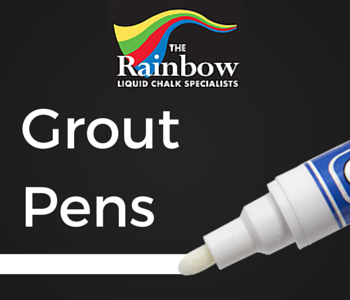
Grout Pens 5mm Nib
£4.45 incl. VAT
To get the best results from your grout pen, try the following tips:
- Match the grout pen colour to the original grout’s colour or choose a completely new one for a fresh look.
- Use the right size nib to fit the space between your tiles – Rainbow Chalk grout pens come in 5mm and 15mm options
- Check your grout pen’s packaging for any special instructions to get the pen ready for use
- Clean and thoroughly rinse your work surface first, to make sure the grout application takes
- Make sure the space between the tiles is completely dry before you start
- Test the grout pen on a piece of paper before applying it to your walls. This will help you gain a feel for the flow of the pen.
- Plan your route to minimise smudging newly-done areas with your hand
- Keep both damp and dry rags close at hand to clean up any smudged areas as you go
- Leave at least an hour for your new grout paint to dry before applying a second coat if needed
- Wait a couple of hours after you’re finished before getting the tiles damp
For a more comprehensive guide to using your grout pen read our using a grout pen guide or take a look at our complete guide to grout pens article.
A Cost Effective Way To Brighten Grout
Replacing grout the traditional way can be costly – as well as buying the grout you’ll need to make sure you have a grout removal tool, a grout float for applying new grout, and some grout sealer for after your application.
Grout pens offer a much more cost effective option. They’re inexpensive, one pen is good for most shower or kitchen tile areas, and you don’t need to buy any special tools or equipment to go with them.
So, what now?
Well, if you want to make your grout sparkle with minimal fuss and cost, a grout pen is just what you need.
Just click on the picture below to get started.
